Paperclip AI Day 2: Build Your AI Company Org Chart
Launch Paperclip AI with one command, hire AI agents as CEO, CTO, and Engineer, and build reporting lines for your zero-human company.

📎 Picture this: In any business simulation game, the first step is always building your base and hiring staff. Today, we’ll launch your business empire with a single command and recruit your first batch of “corporate drones” (scratch that, elite talent)—organizing their seating chart and making it crystal clear who manages whom.
What We’ll Cover Today
Yesterday we introduced Paperclip AI. Today, it’s time to get down to business and actually start your company. As the opening move in your “Boss Simulator,” today you will master:
- Server Launch Guide: Initialize your local company with a single command (all data stays local, secure, and painless).
- Bring Your Own Employees: Why your employees can be Claude, Cursor, or even a script running in Docker.
- Forming Your Roster: Hire a CEO and establish reporting lines (CEO → CTO → Engineer | CEO → CMO → Ops), saying goodbye to flat, one-person sweatshops forever.
One-Click Server Launch: Your Digital Empire’s Infrastructure
Have you ever played SimCity or Cities: Skylines? Before the game begins, you need a plot of land to build your headquarters.
Starting a company in Paperclip AI doesn’t require waiting in line at the commercial registry, nor does it involve pulling your hair out over dozens of environment variables. Open your terminal and type this magic command:
npx paperclipai onboard --yesHit enter. In the time it takes to grab a cup of coffee, your “corporate tower” will be built. You’ll know it’s a success when you see something like this:
██████╗  █████╗ ██████╗ ███████╗██████╗  ██████╗██╗     ██╗██████╗
██╔══██╗██╔══██╗██╔══██╗██╔════╝██╔══██╗██╔════╝██║     ██║██╔══██╗
██████╔╝███████║██████╔╝█████╗  ██████╔╝██║     ██║     ██║██████╔╝
██╔═══╝ ██╔══██║██╔═══╝ ██╔══╝  ██╔══██╗██║     ██║     ██║██╔═══╝
██║     ██║  ██║██║     ███████╗██║  ██║╚██████╗███████╗██║██║
╚═╝     ╚═╝  ╚═╝╚═╝     ╚══════╝╚═╝  ╚═╝ ╚═════╝╚══════╝╚═╝╚═╝
  ───────────────────────────────────────────────────────
  Open-source orchestration for zero-human companies

...
│
│  ✓ Server port: Port 3100 is available
│
◇  Summary ──╮
│            │
│  9 passed  │
│            │
├────────────╯
│
└  All checks passed!

│
◇  Starting Paperclip server...
There’s no black magic here, and you don’t need deep database knowledge. This command spins up a local database based on PGlite on your machine and sets up your visual dashboard right away.
The most crucial point: All of your data stays completely local.
This means your trade secrets, project plans, and even your employees’ “dark histories” all reside squarely on your own hard drive. Nothing is secretly uploaded to the cloud. It’s safe, painless, and completely free. Right now, your executive office is fully furnished—just waiting for you to check the big board.
If you ever want to migrate your database to a remote Postgres instance in the future, that’s fully supported too!
Recruiting Your First Executive: The CEO
The base is built, but you can’t be the only general in such a massive office. For a frictionless start to the joy of giving orders, we’ll keep the team simple for now and only hire your company’s first core employee—the CEO.
When you first enter the Paperclip dashboard, you need to:
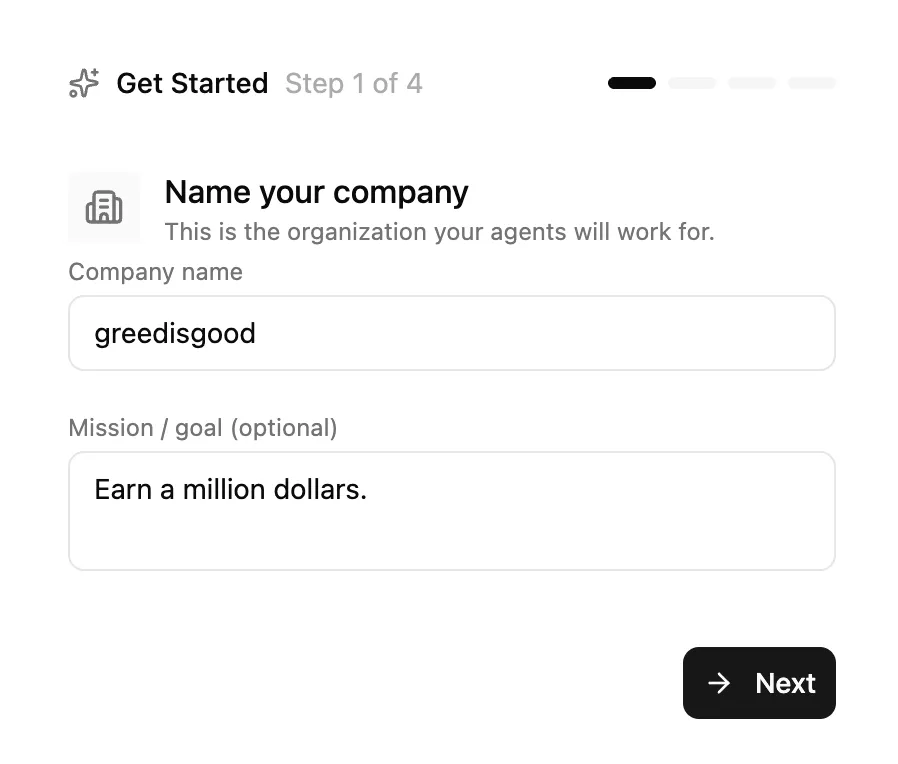
1. Give Your Company a Catchy Name
If you’ve played Warcraft 3, you’ll know what this means!
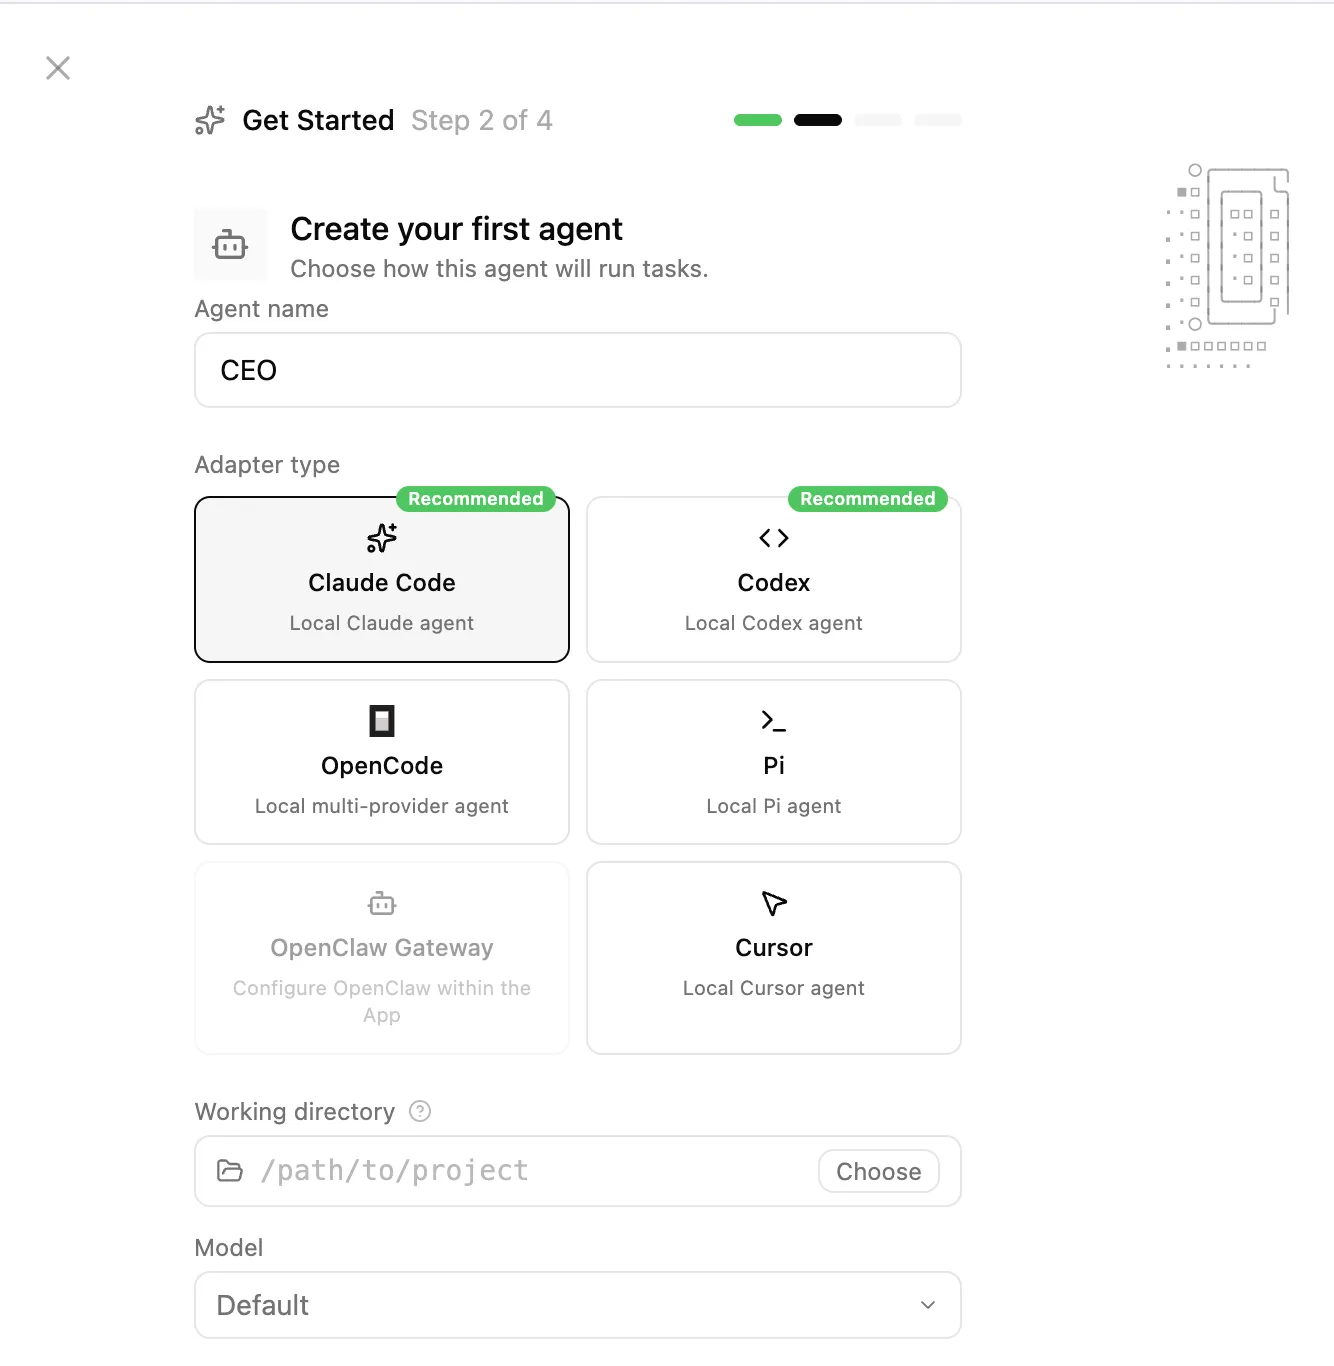
2. Create Your First Agent
Naturally, we should name them CEO. Here, I’m choosing Opus 4.6, which I currently consider the strongest model on earth, then click Next.
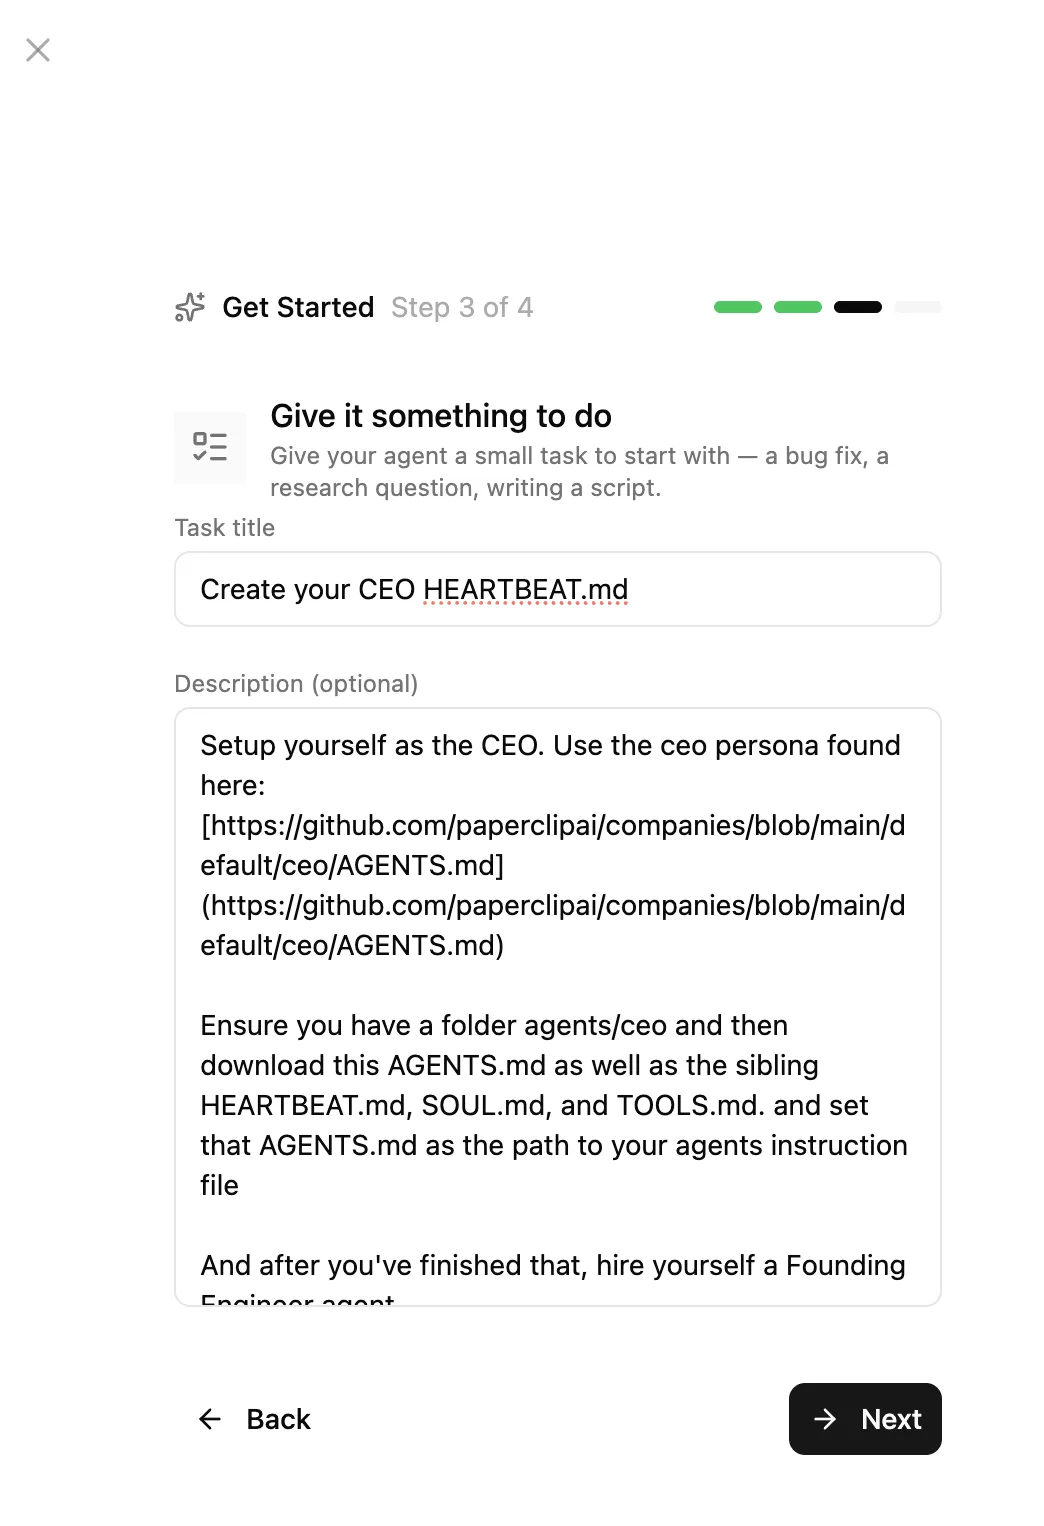
3. Assign Your First Task to the CEO
I’ll just use the default placeholder text here, letting it create its own metadata files: AGENTS.md, SOUL.md, HEARTBEAT.md, TOOLS.md.
4. Go Ahead and Publish the First Issue
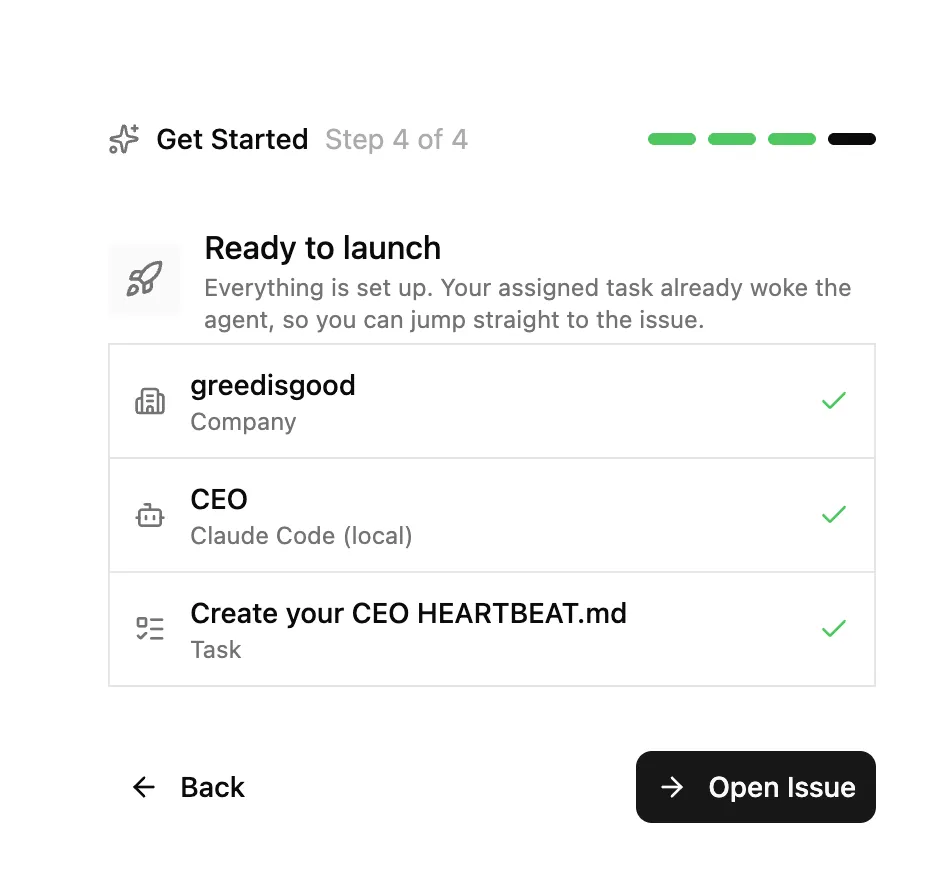
Once it’s done, we should see the CEO’s first reply in our inbox.
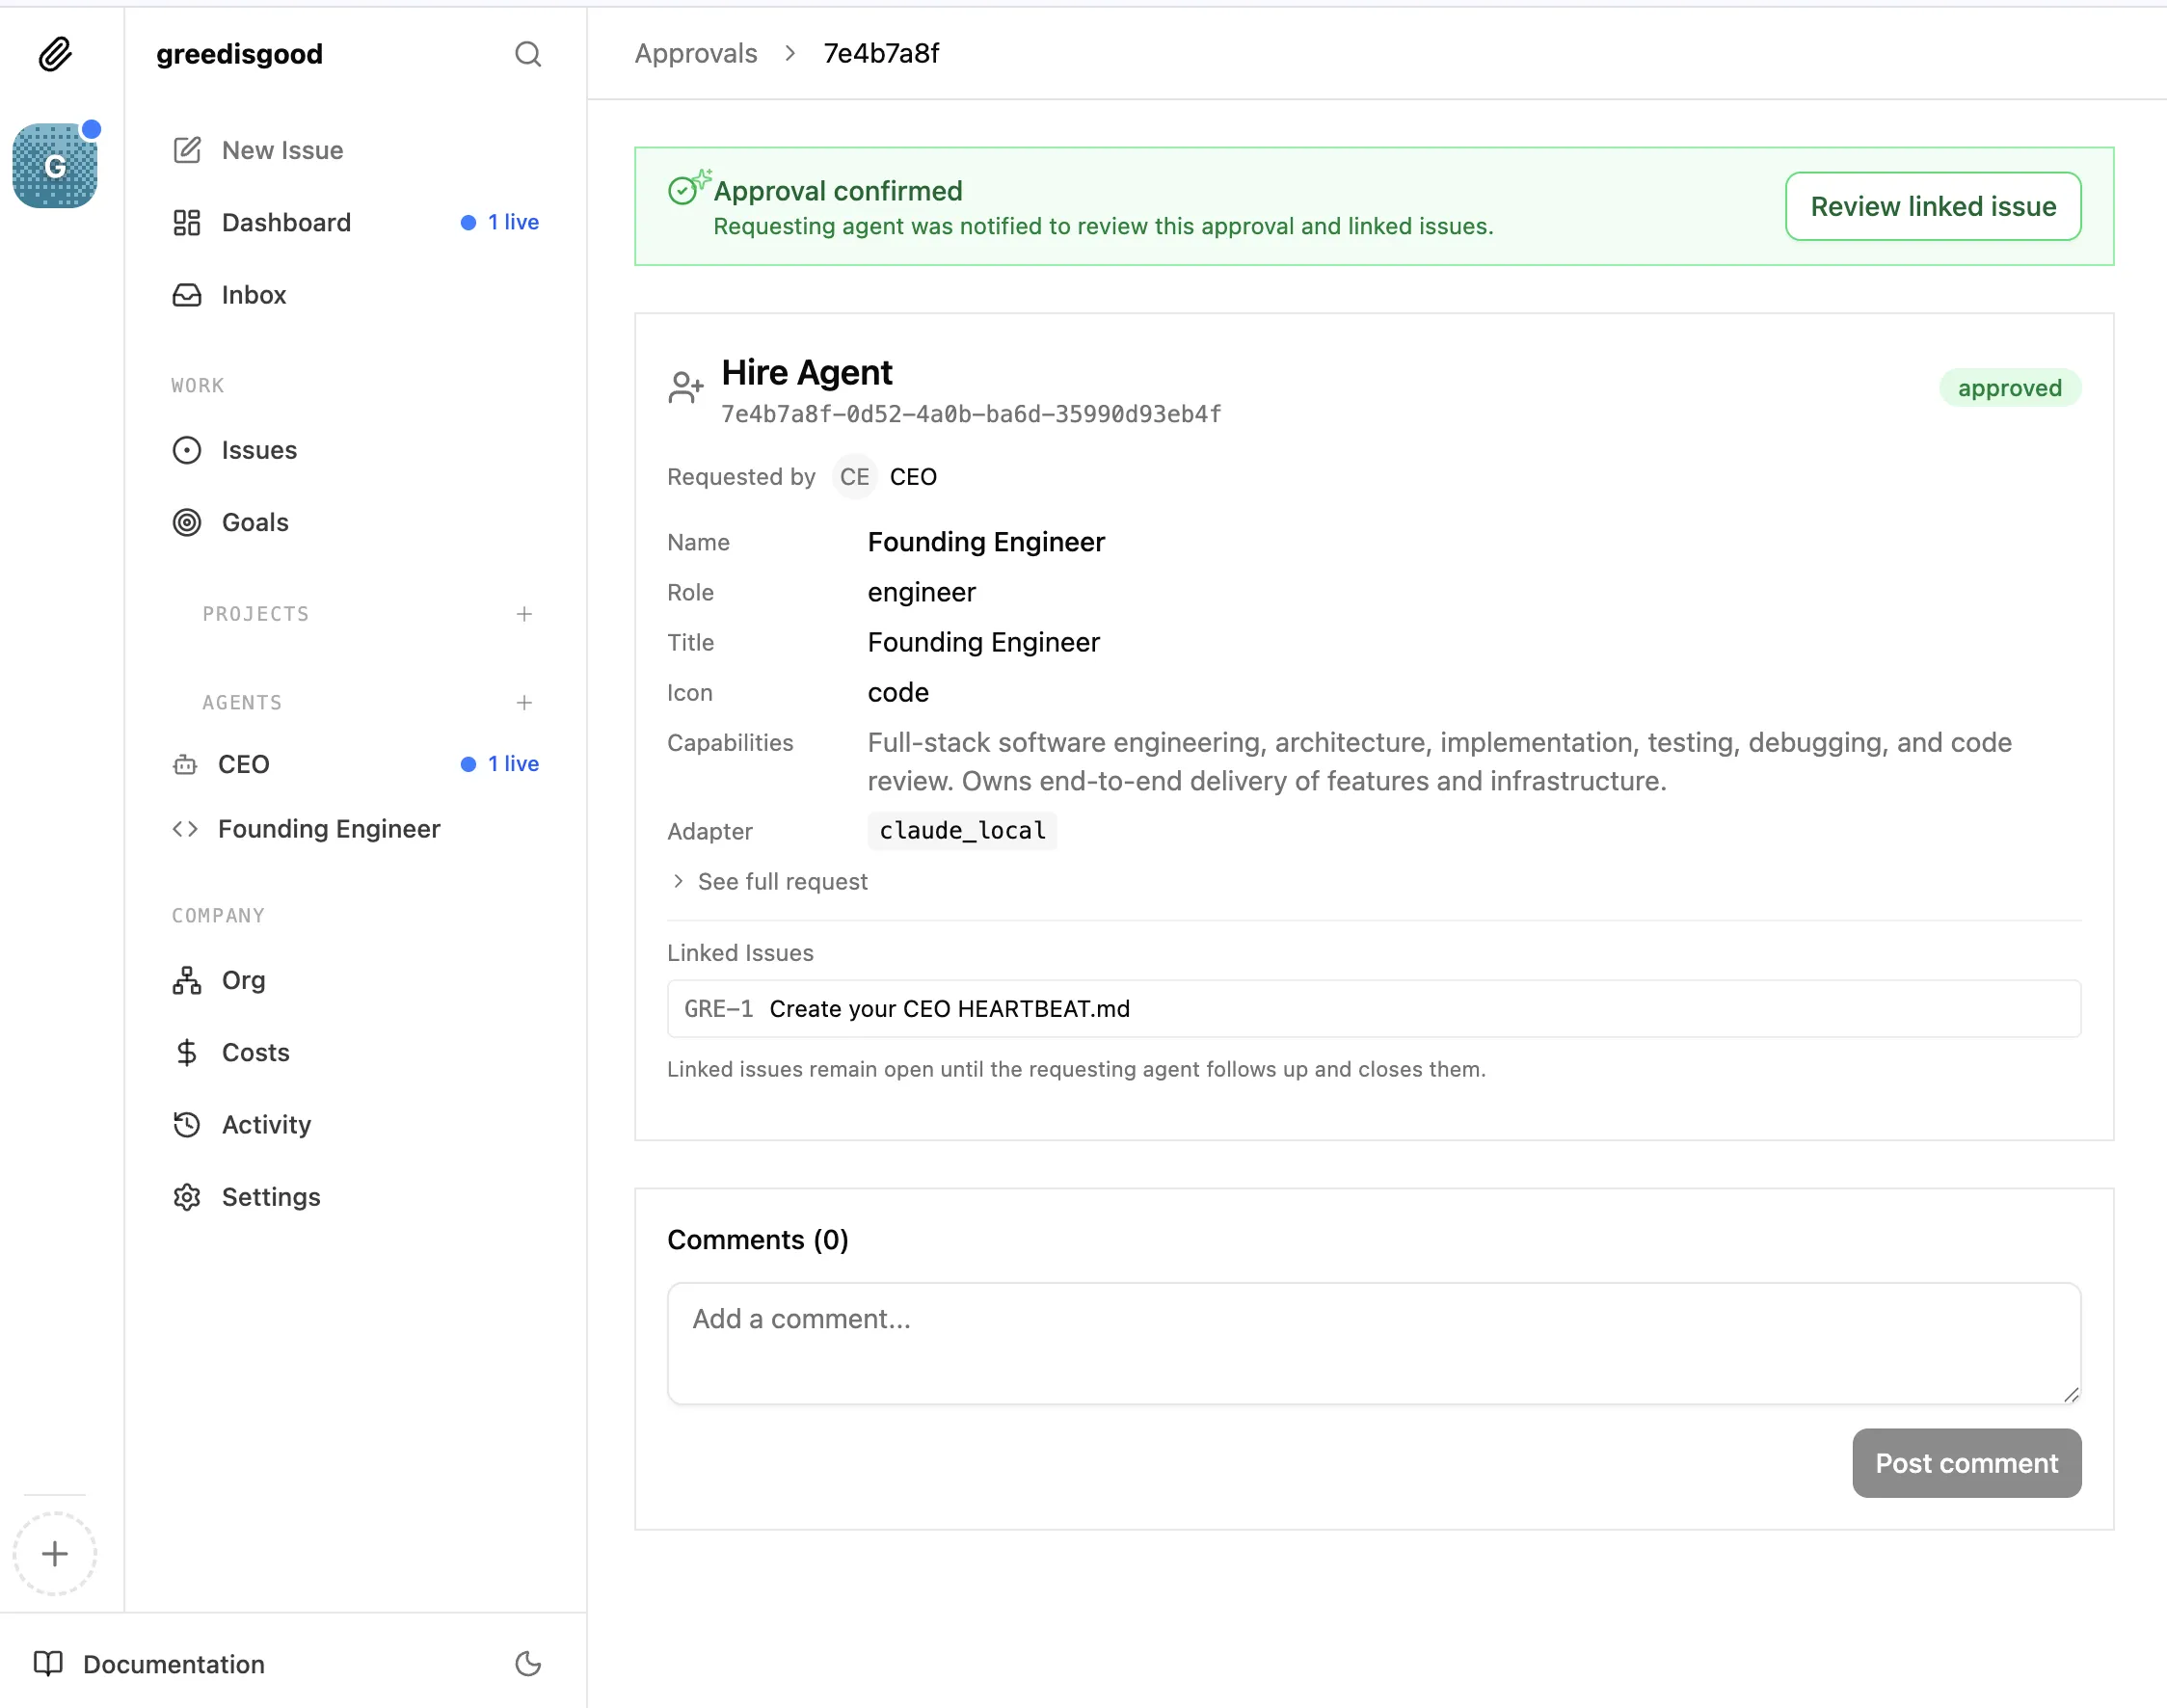
They want to hire the company’s first engineer and need our (the Chairman’s) approval.
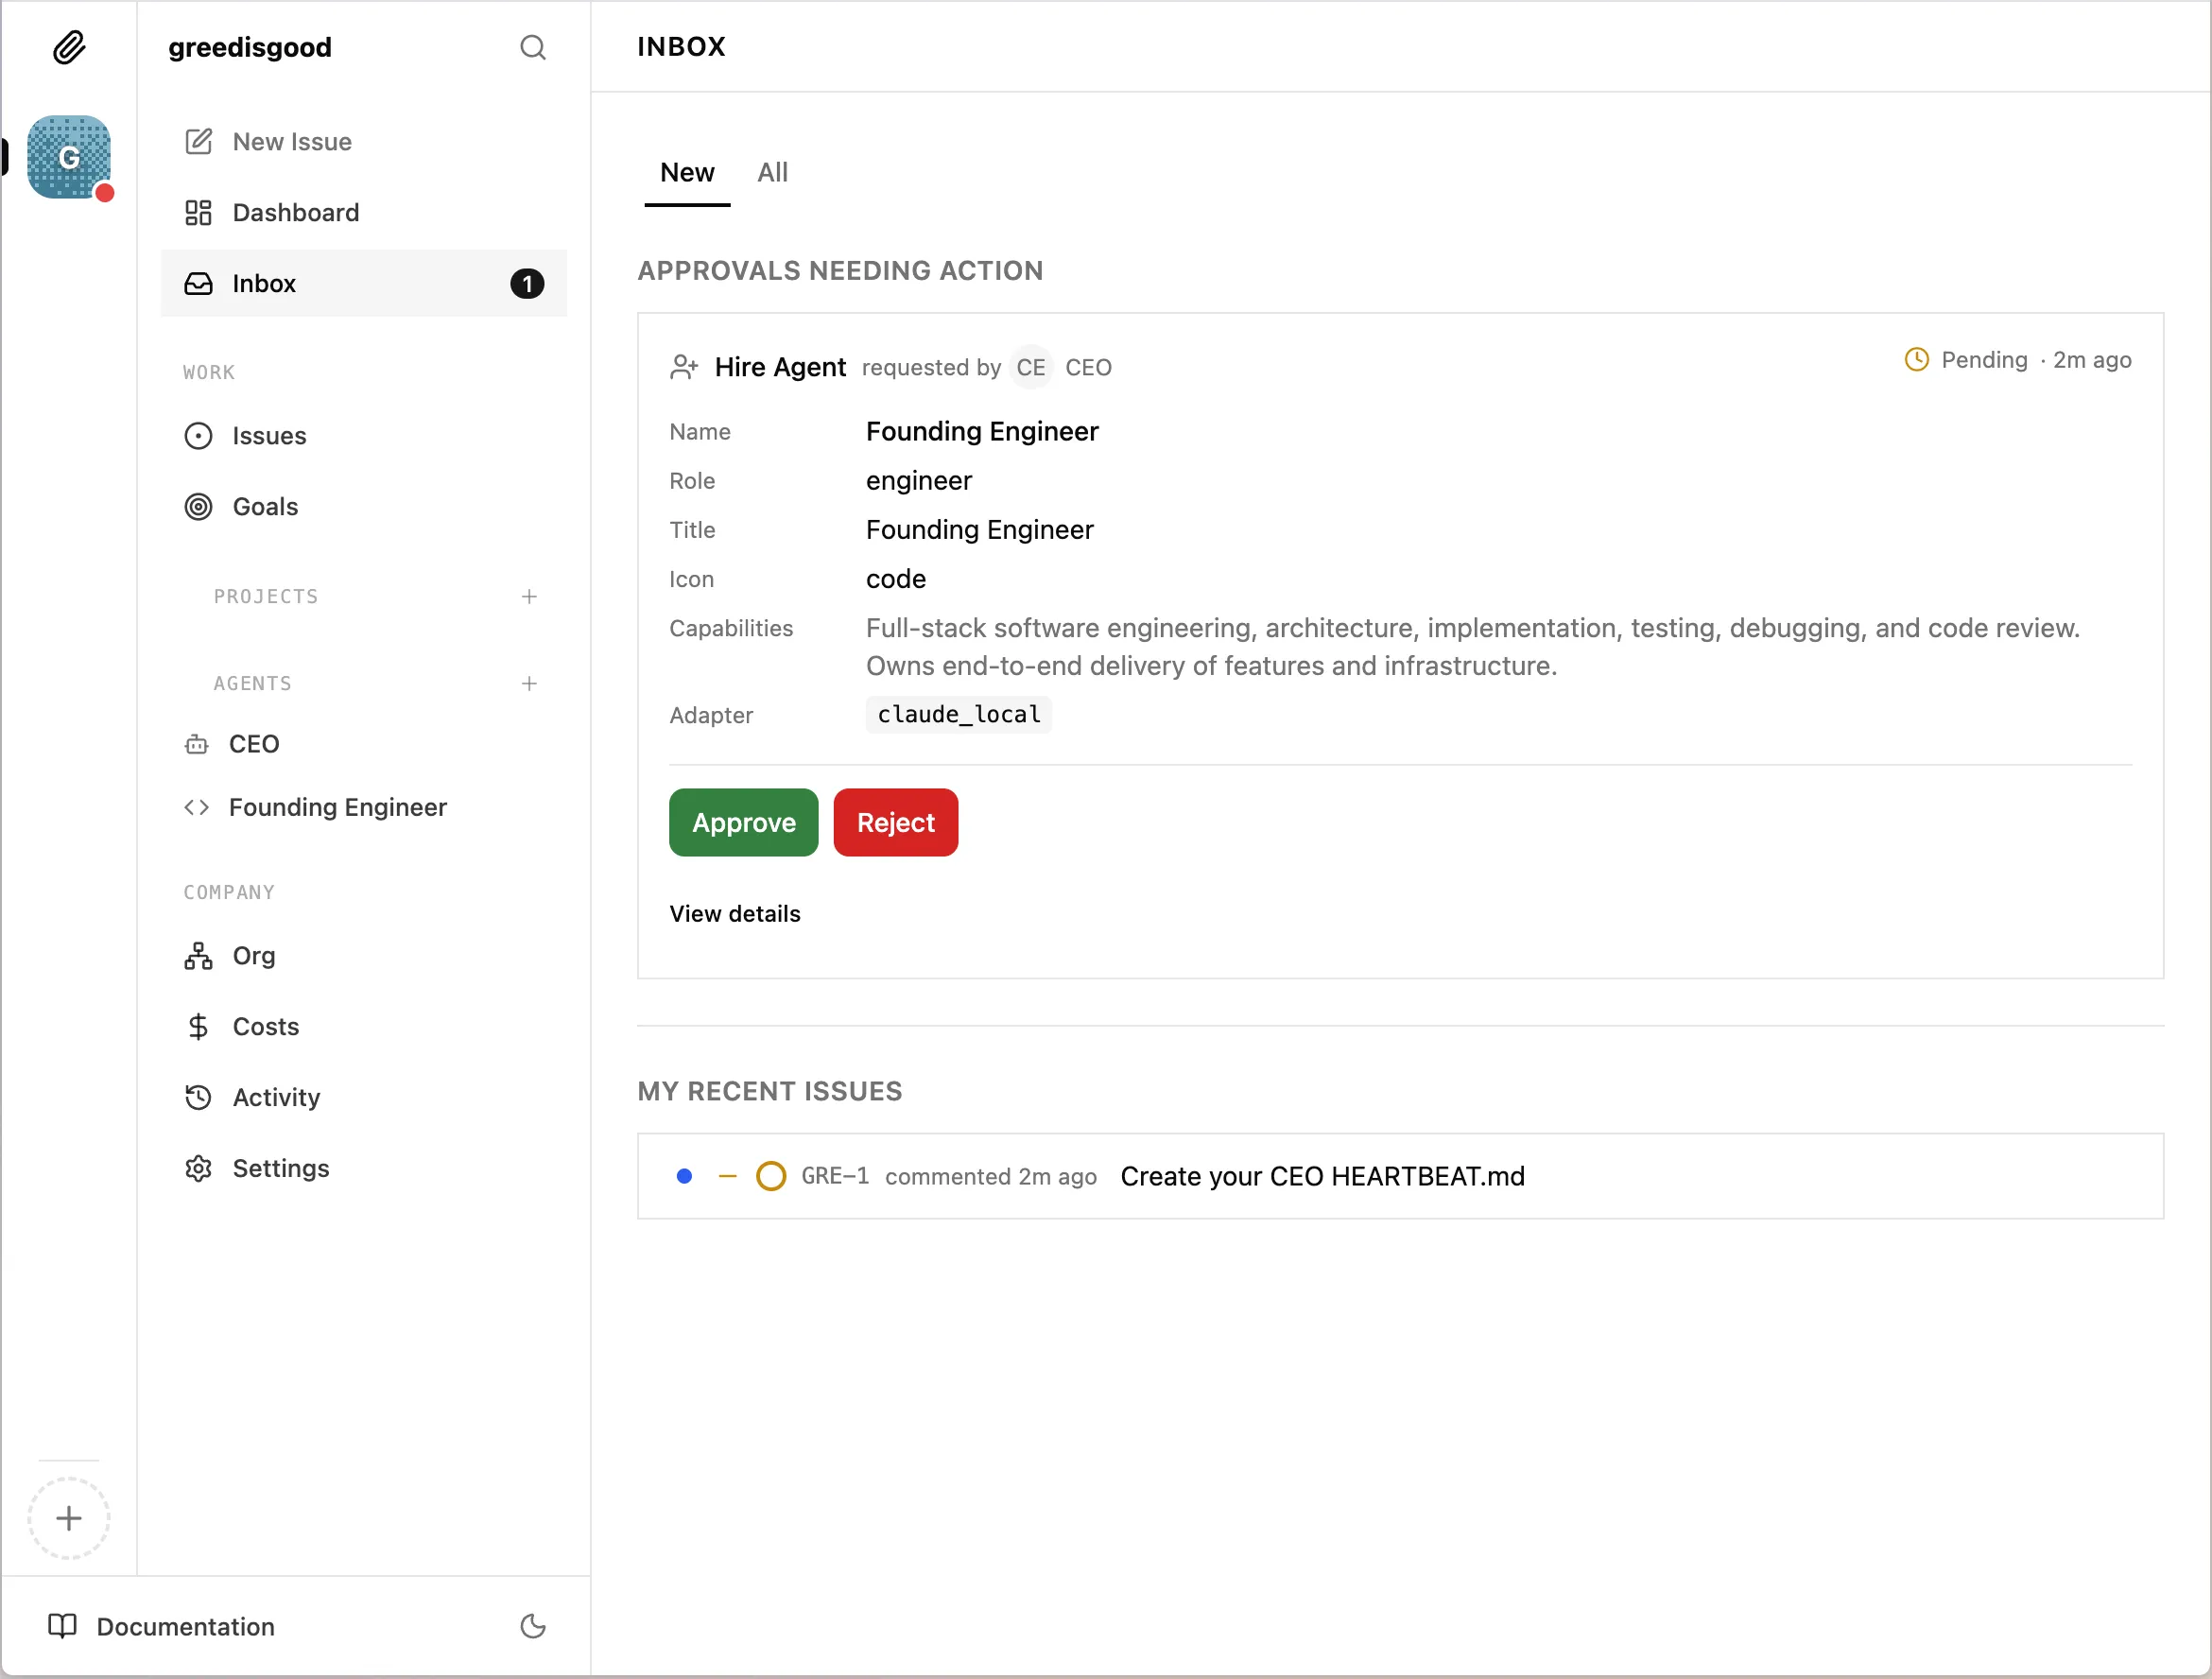
We can just go ahead and approve it.
Pulling Rank: Seating Your Employees (Org Chart)
Think back to the days when you used AI purely as a “cyber assistant”: You were one person, frantically switching across 20 chat windows. “Hey, tweak this code.” “Could you summarize this paragraph for me?” You were flat-managing everyone all by yourself—acting as both the boss and the foreman, working like a dog every single day.
But in Paperclip, you need to learn how to delegate and slack off. The reason a company is a company is because it has an Org Chart.
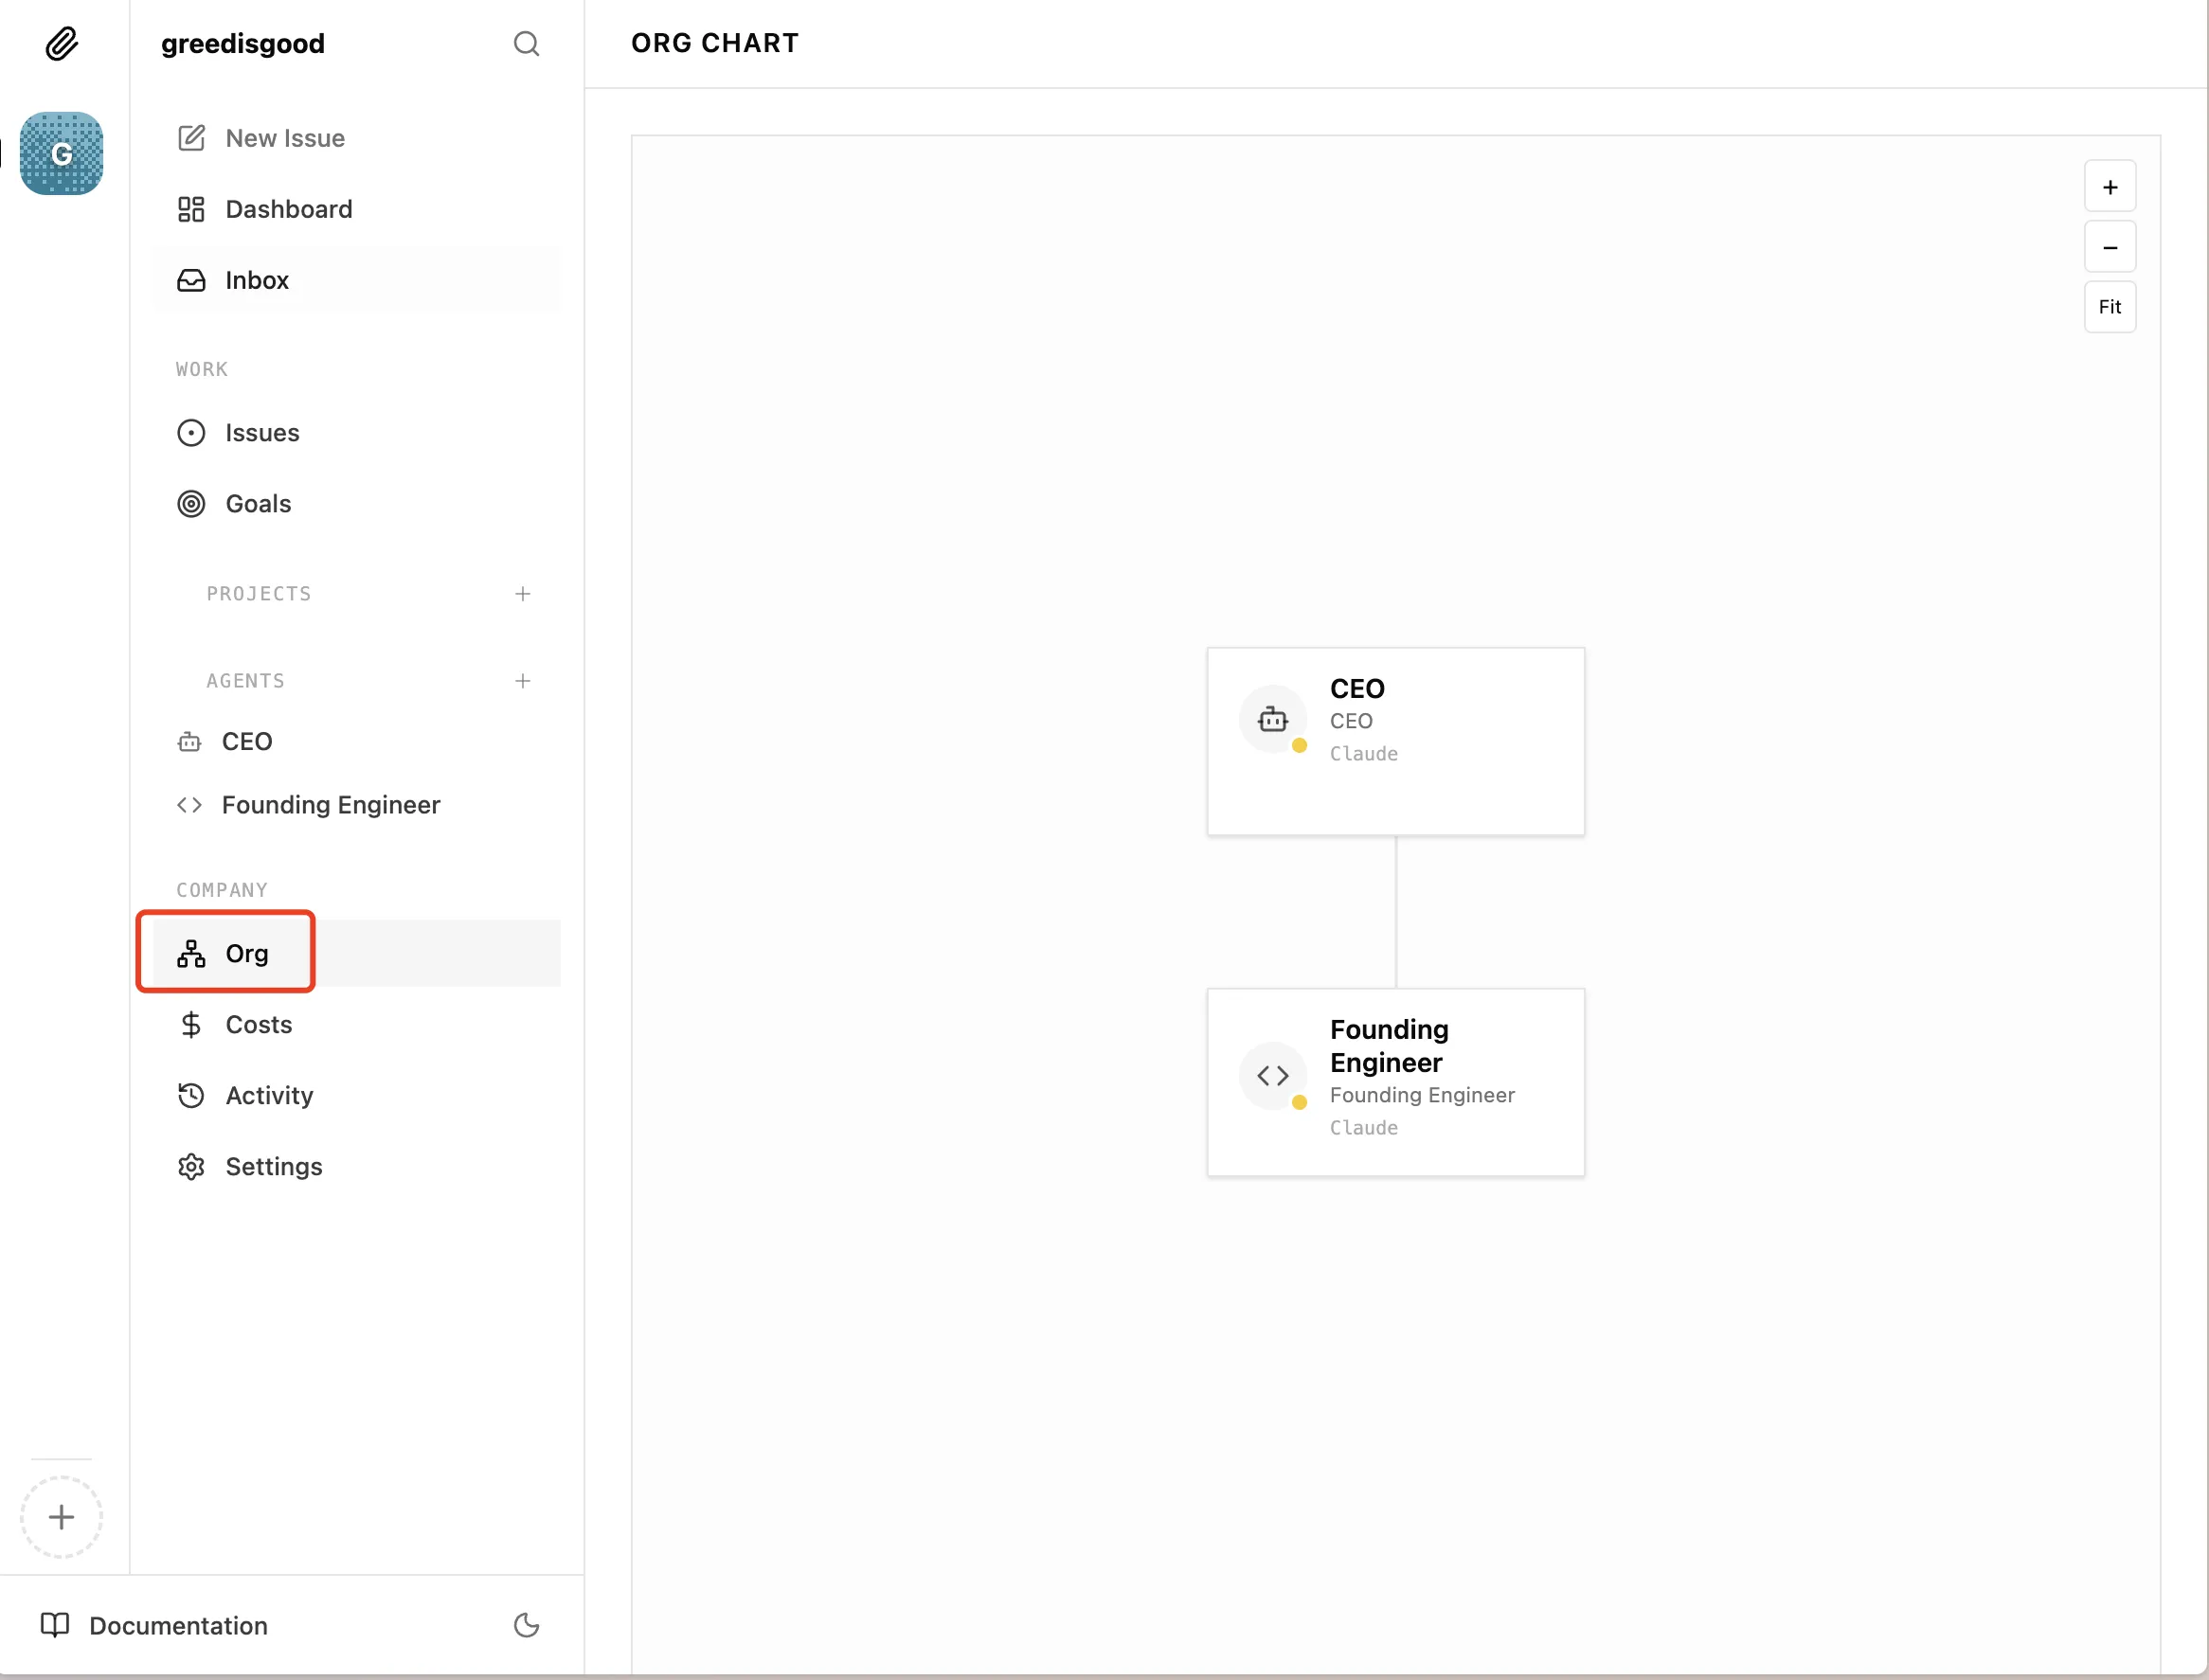
Our company is still small right now, so we don’t need a CTO yet. We can just let the CEO direct the engineer directly.
Now (and in the future), you only need to do one thing: Assign tasks to the CEO. They will distribute the work to other employees. That’s the corporate hierarchy! Do not micromanage every employee’s daily tasks. Since this is a Boss Simulator, you are the sole Boss (Chairman) of this company.
Below, we can set up different configurations for each Agent:
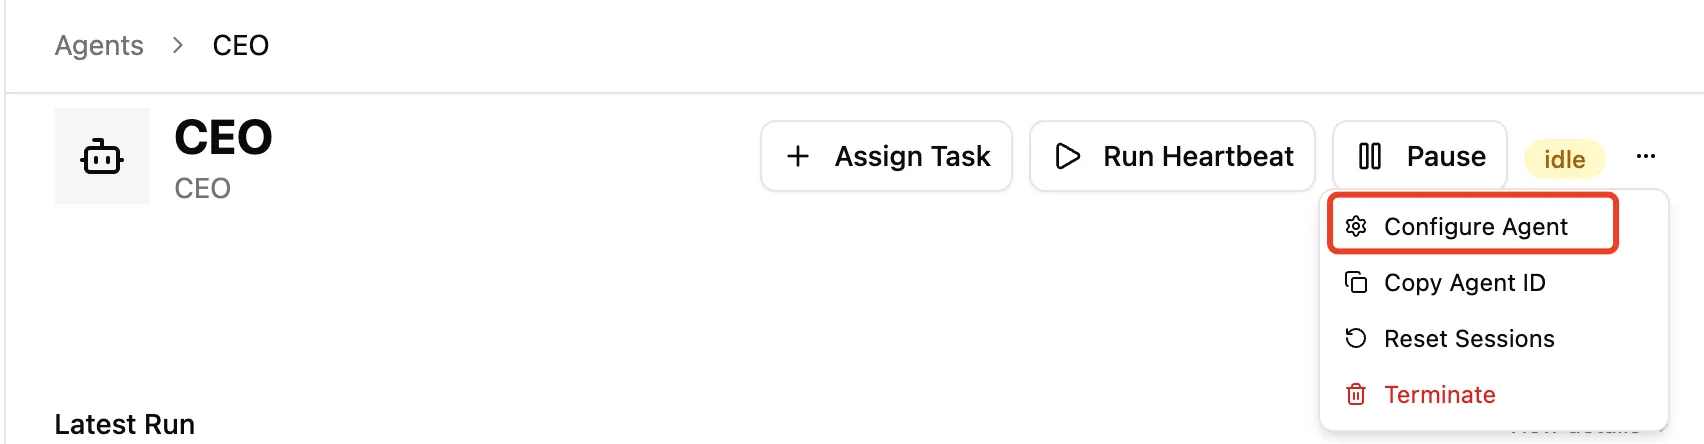
There are a few critical sections in these settings:
Agent Settings:
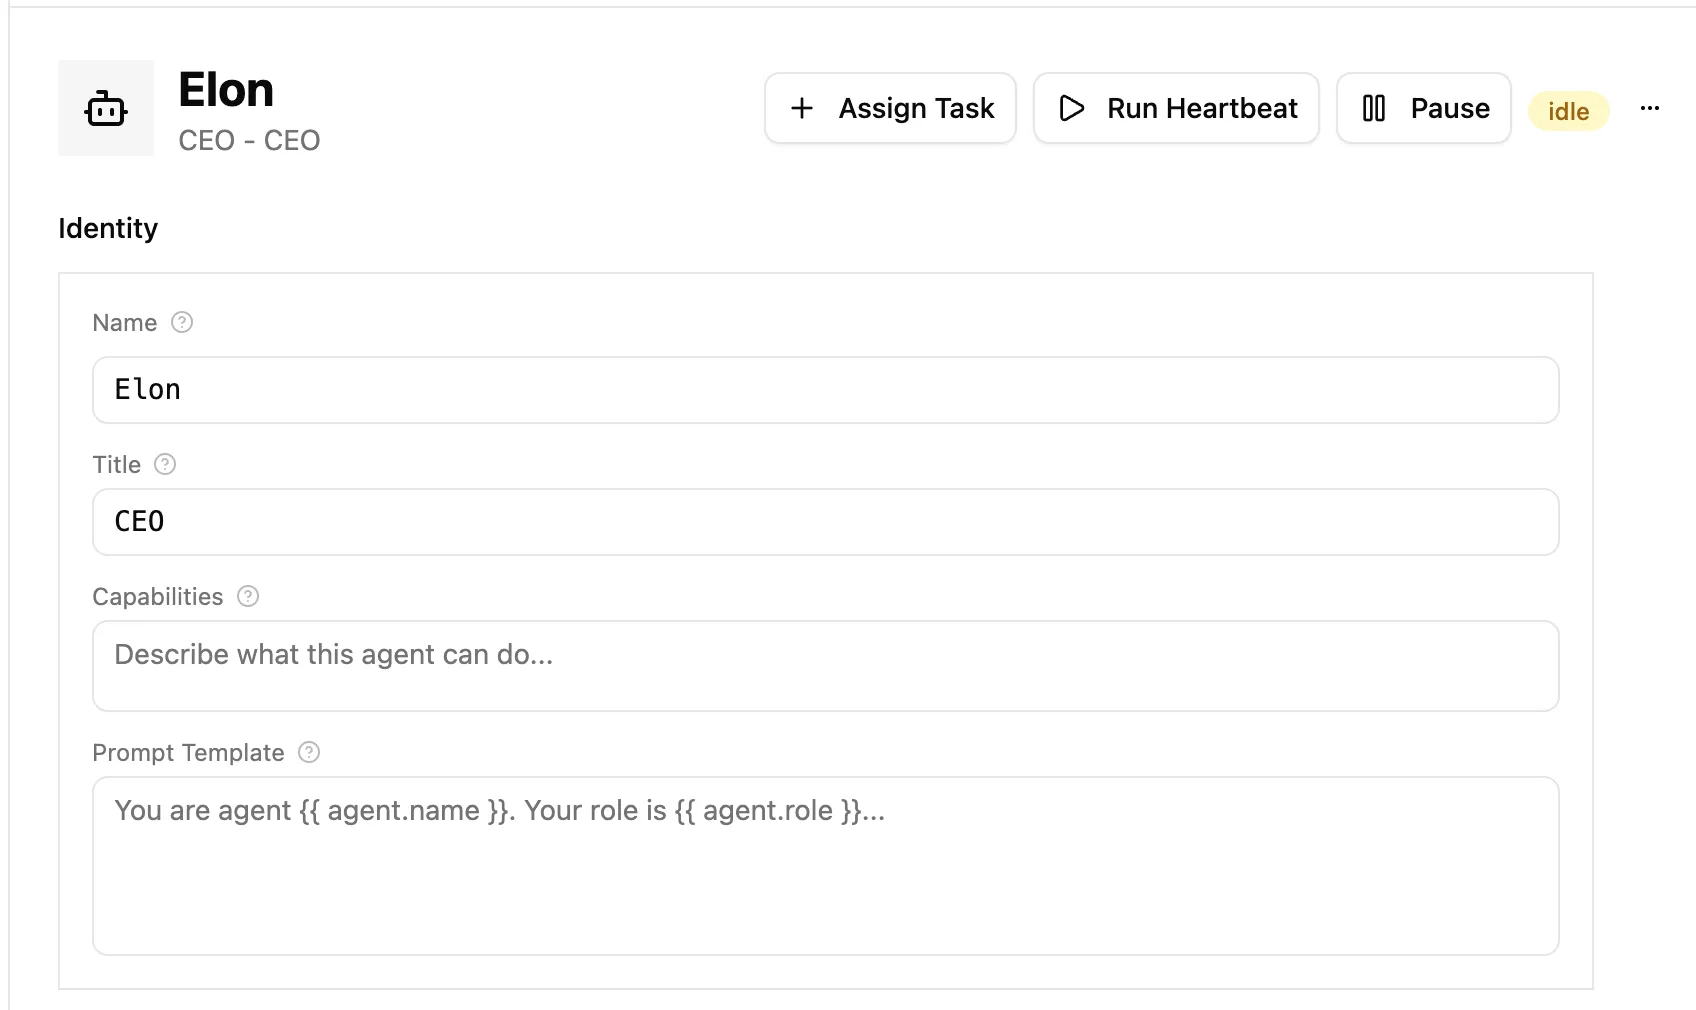
- Name: Calling them “CEO” was a bit too casual earlier. Let’s give them a proper name—let’s call him Elon.
- Title: What is this Agent’s title? (This is purely for display on the Org Chart—it really is a workplace simulator!)
- Capabilities: What are they capable of doing?
- Prompt Template: The prompt sent to the agent on every heartbeat. Supports variables like
{{agent.id}},{{ agent.name }}, and{{ agent.role }}. PS: Currently there is a bug, please keep this field empty Related PR (currently unmerged)
Adapter:
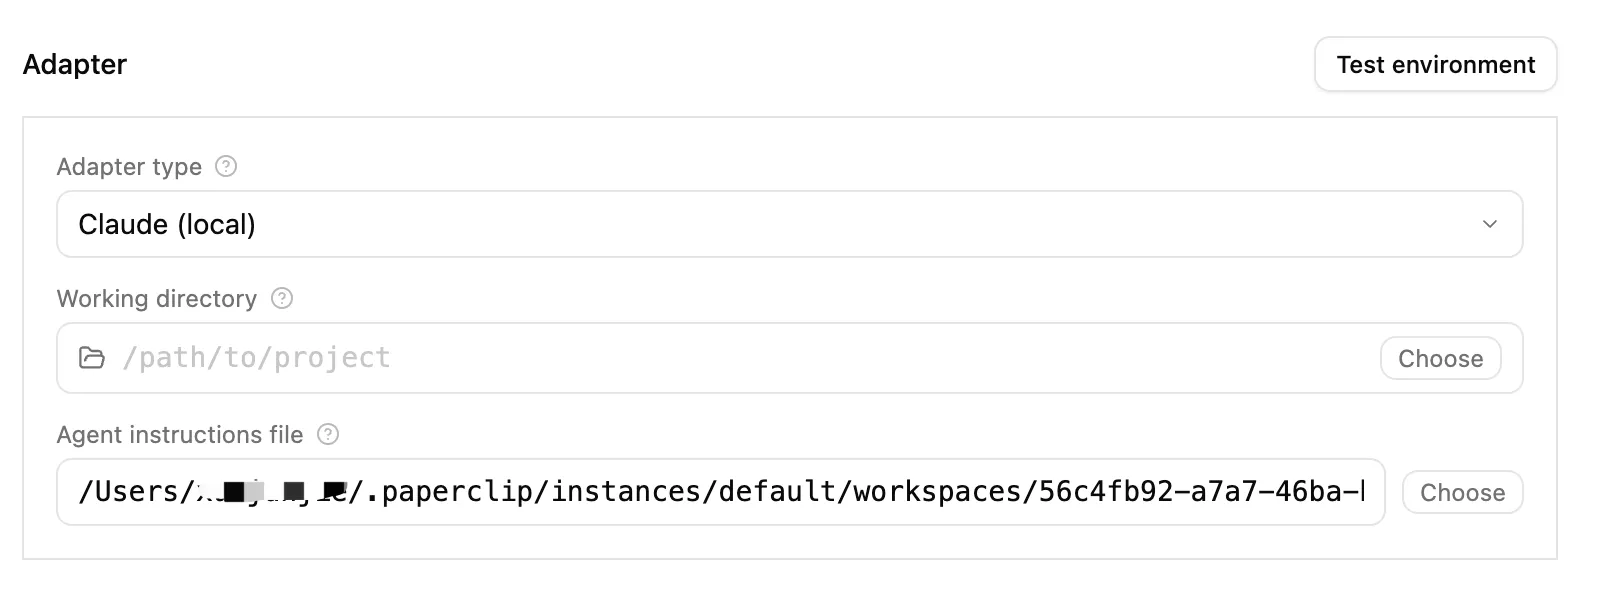
- Adapter Type: How this agent runs: local command-line interface (Claude/Codex/OpenCode), OpenClaw Gateway, spawned process, or generic HTTP webhook. (In the future, Paperclip AI will support connecting to models from different providers or even other products).
- Working Directory: Remember to use absolute paths.
- Agent Instruction File: The path my Elon created is
/Users/myname/.paperclip/instances/default/workspaces/uuid/agents/ceo/AGENTS.md.
In this ceo directory, there are also several other files and folders (which you can modify freely):
$  ceo ls -lrt
drwxr-xr-x@    - life
drwxr-xr-x@    - memory
.rw-r--r--@ 1.2k AGENTS.md
.rw-r--r--@ 2.9k HEARTBEAT.md
.rw-r--r--@ 2.6k SOUL.md
.rw-r--r--@   86 TOOLS.md
Config and Permissions:
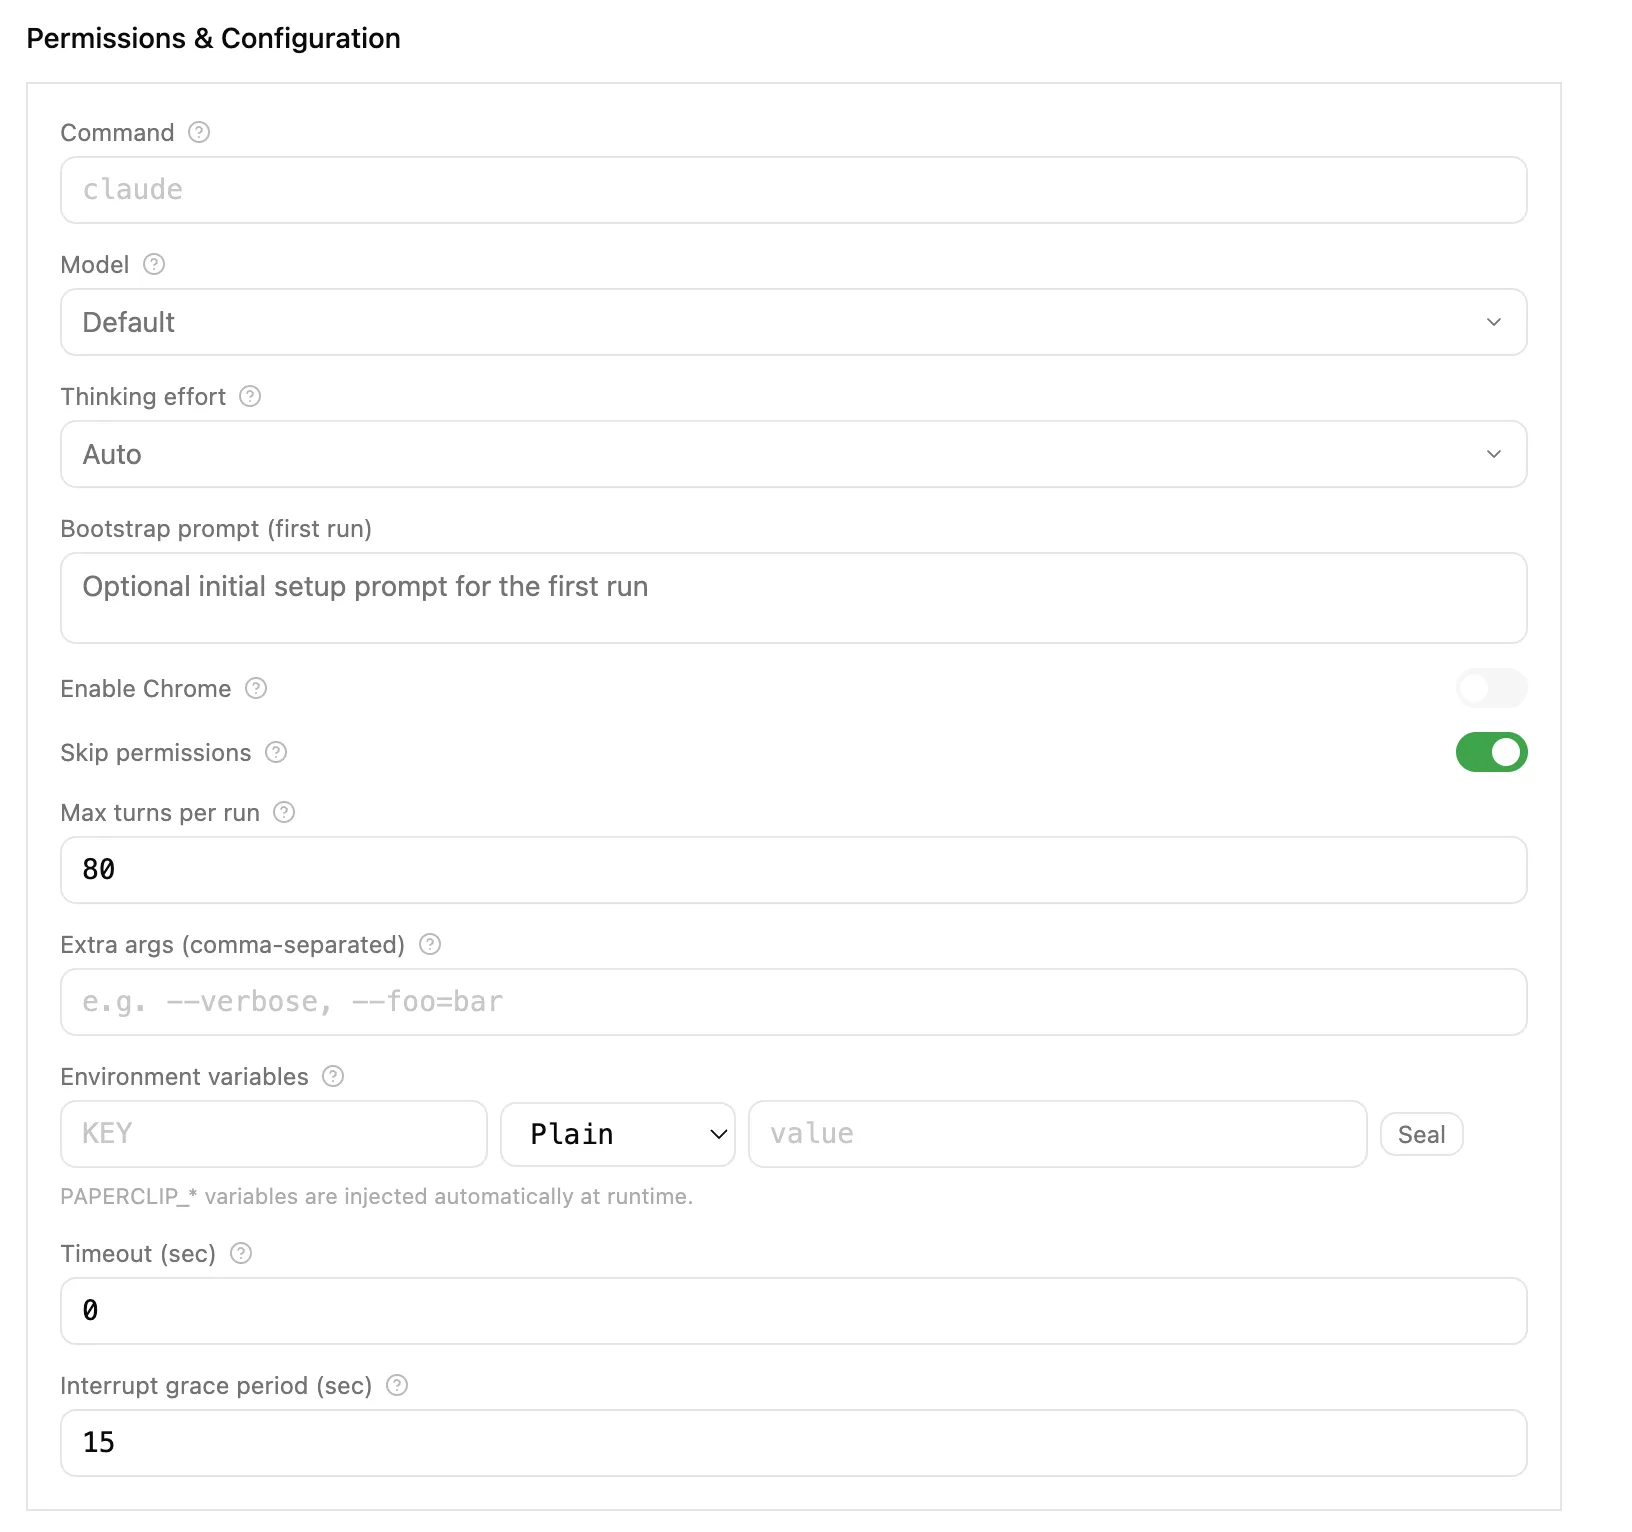
- Command: The default is usually fine (this is tied to the Adapter).
- Model: This is very important (you can assign different models to different Agents to save on Token costs).
- Thinking: Defaulting to Auto works nicely.
- Enable Chrome: Remember to turn this on, so they can operate the Chrome browser!
We’ll skip explaining the other fields for now.
Other Configurations:
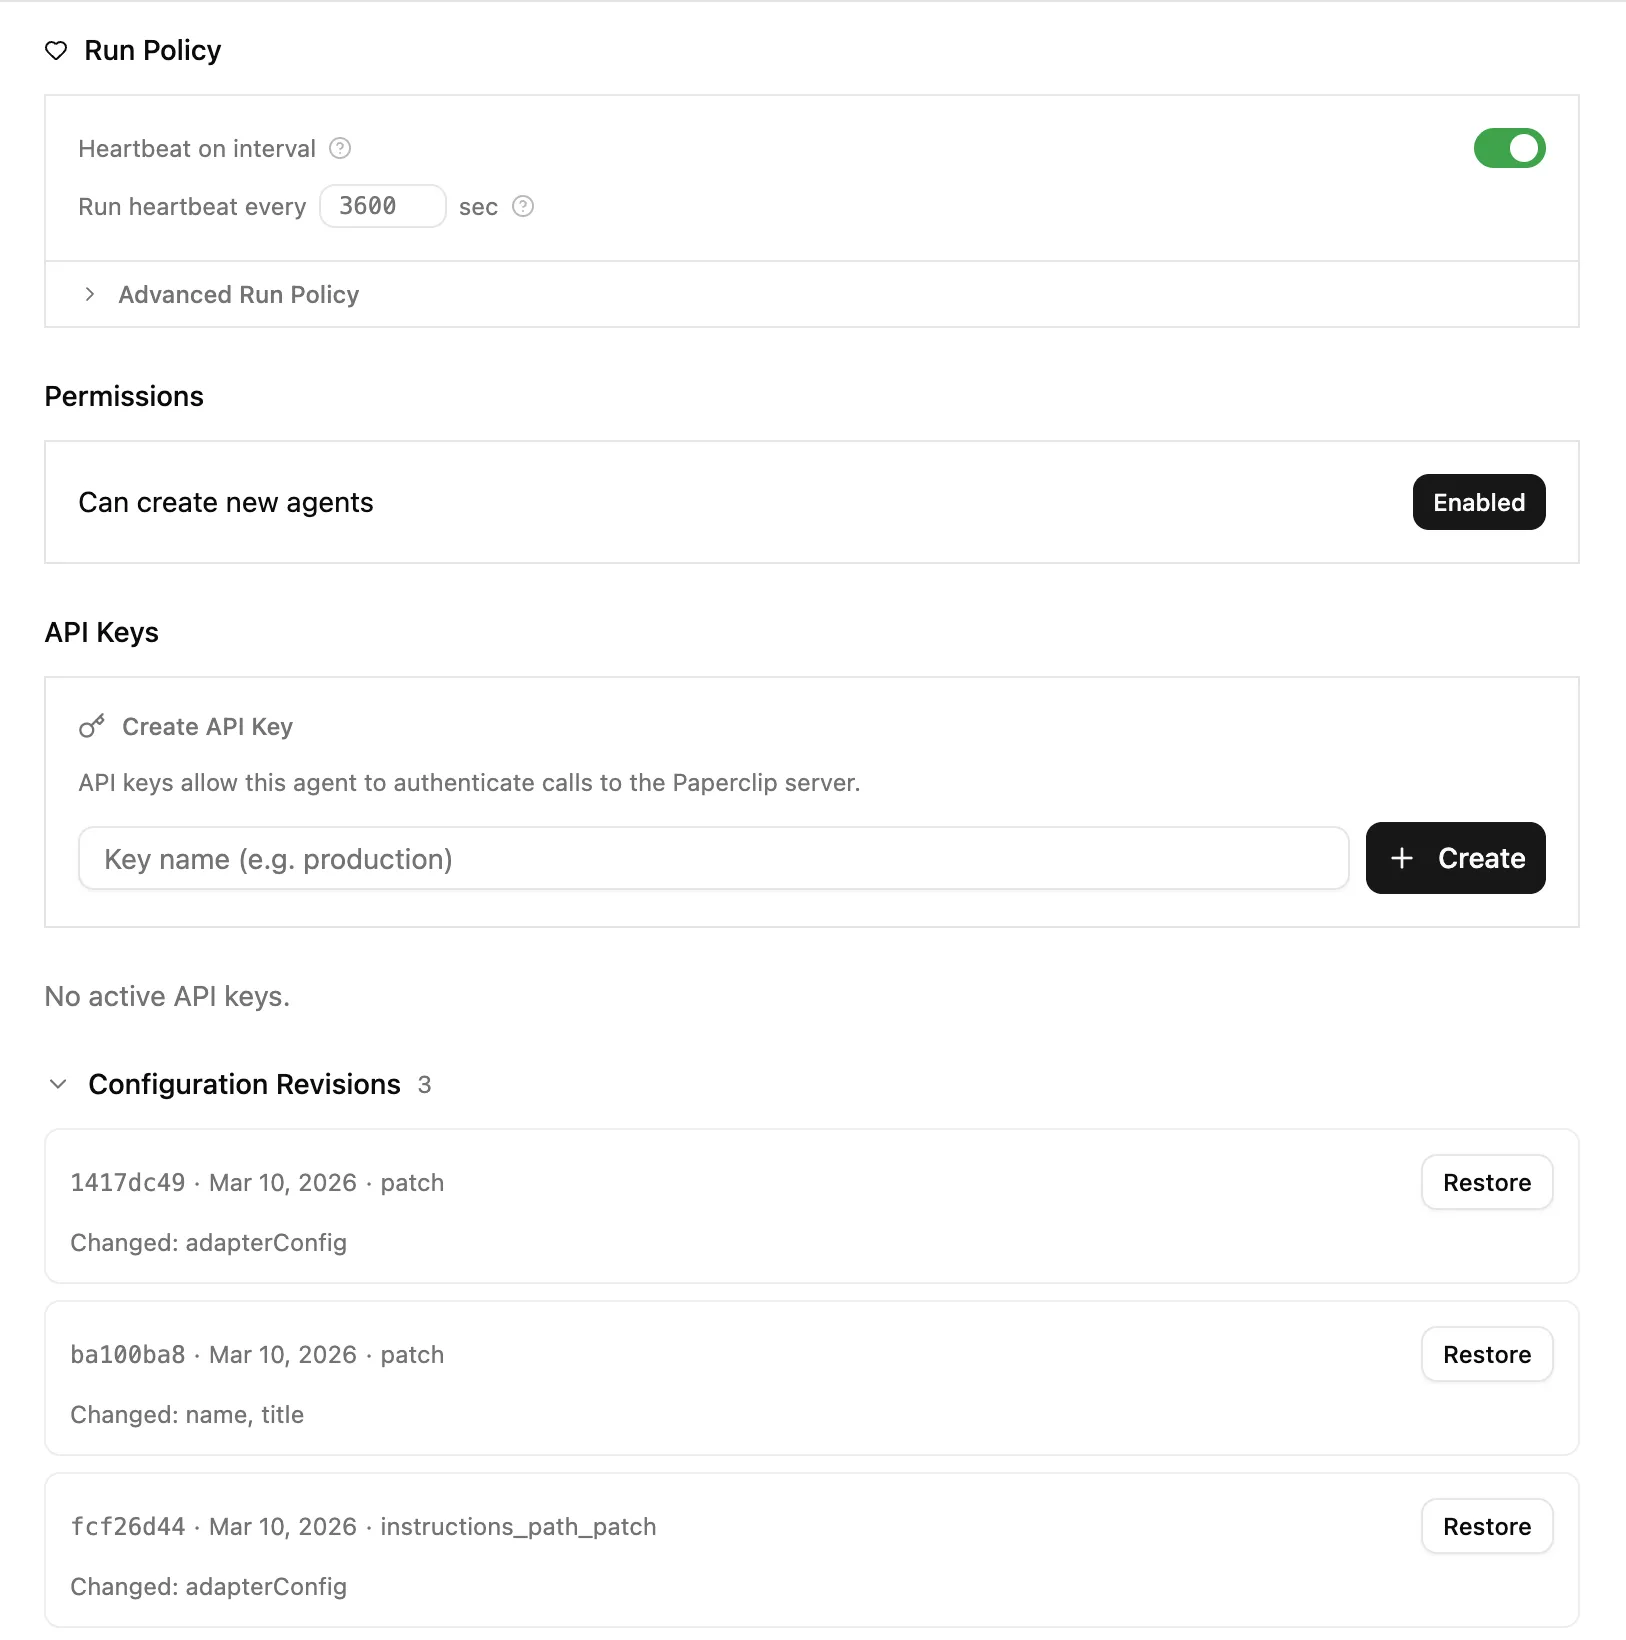
In this ecosystem, your AIs are no longer freelancers picking up side gigs; they are cogs in your corporate machine. (It is highly recommended to treat each Agent as a real person to enhance the immersion of the whole system, which will also help you figure out what your system is actually missing):
- They have their own Name and an official Title.
- They have a clear Boss to report to.
- They have a dedicated Job Description (JD).
📎 The Boss’s Playbook: Never skip levels to give commands. If an Engineer writes a stupid bug, you, as Chairman, should absolutely not roll up your sleeves and fix their code yourself. What you need to do is directly reject the task on the dashboard, and let the CTO scold their subordinate: “How did you review this code? Do it again!”
Today’s Tasks ✅
Today, you need to get hands-on:
- Open your terminal, run
npx paperclipai onboard --yes, and get your company backend up and running. - Grab a piece of paper (or do it in your head) and sketch a simple Org Chart: What title should your CEO have? If they need two people under them, what should their job titles be? What are they responsible for? (Don’t create too many Agents right at the start, and entirely offload the recruiting to your CEO).
Once you’ve wrapped your head around this hierarchy, tomorrow we’ll teach you how to assign those “high-level” goals to these employees, getting them to work their hearts out for your corporate vision.
🎮 Hidden Cheat Code: How to “Wipe Save and Restart”
Because the game (company) data is stored entirely in hidden folders on your local computer, if you feel your first run wasn’t great, or if you just want to start fresh from a previous installation, you can always “wipe your save file” and restart.
Run this command in your terminal to clear the local database:
rm -rf ~/.paperclipAfter clearing it out, you can run npx paperclipai onboard --yes again to reboot the server, just like a new player.
Teaser: Day 3 — Goal Alignment
Tomorrow, we’re going to talk about painting the big picture (setting goals) for your company. How do you ensure that when the low-level engineer typing away at code hits every keystroke, they have the grand vision of “helping the boss make a million bucks” in their head? How do tasks get passed down layer by layer, carrying their “ancestral genes”?
Boss, we’ll see you in the boardroom tomorrow.
Launch the server, recruit your staff, and sort out the seating chart. AI are no longer stragglers—they are the core pillars building your business empire.